Transformations in Matter and Energy Carbon TIME is an NSF-funded partnership led by Michigan State University
Plants Unit
Plants is one of the six Carbon TIME units. If you are new to teaching Carbon TIME, read the Carbon TIME FAQ: Which Units Should I Teach.
The Plants Unit supports students in using core disciplinary ideas, science practices, and cross-cutting concepts to develop scientific explanations of how different plants transform matter and energy as they grow, move, and function.
Follow these steps to get ready to teach the Plants Unit.
 |
 |
 |
 |
 |
Lead Editor for 2019 Version
Kirsten D. Edwards, Department of Teacher Education, Michigan State University
Principal Authors
Kirsten D. Edwards, Department of Teacher Education, Michigan State University
Christie Morrison Thomas, Department of Teacher Education, Michigan State University
Elizabeth Tompkins, Michigan State University
Hannah K. Miller, Northern Vermont University
Christa Haverly, Department of Teacher Education, Michigan State University
Charles W. “Andy” Anderson, Department of Teacher Education, Michigan State University
Contributing Authors
Beth Covitt, Jenny Dauer, Jennifer H. Doherty, Allison Freed, Wendy Johnson, Deborah Jordan, Craig Kohn, Lindsey Mohan, Joyce Parker, Emily Scott, Carly Seeterlin, Alex Walus, Nicholas Verbanic, Pingping Zhao
Illustrations
Craig Douglas, Kendra Mojica
This research is supported in part by grants from the National Science Foundation: A Learning Progression-based System for Promoting Understanding of Carbon-transforming Processes (DRL 1020187) and Sustaining Responsive and Rigorous Teaching Based on Carbon TIME (NSF 1440988). Any opinions, findings, and conclusions or recommendations expressed in this material are those of the author(s) and do not necessarily reflect the views of the National Science Foundation or the United States Department of Energy.
Contact the MSU Environmental Literacy Program for more information: EnvLit@msu.edu.
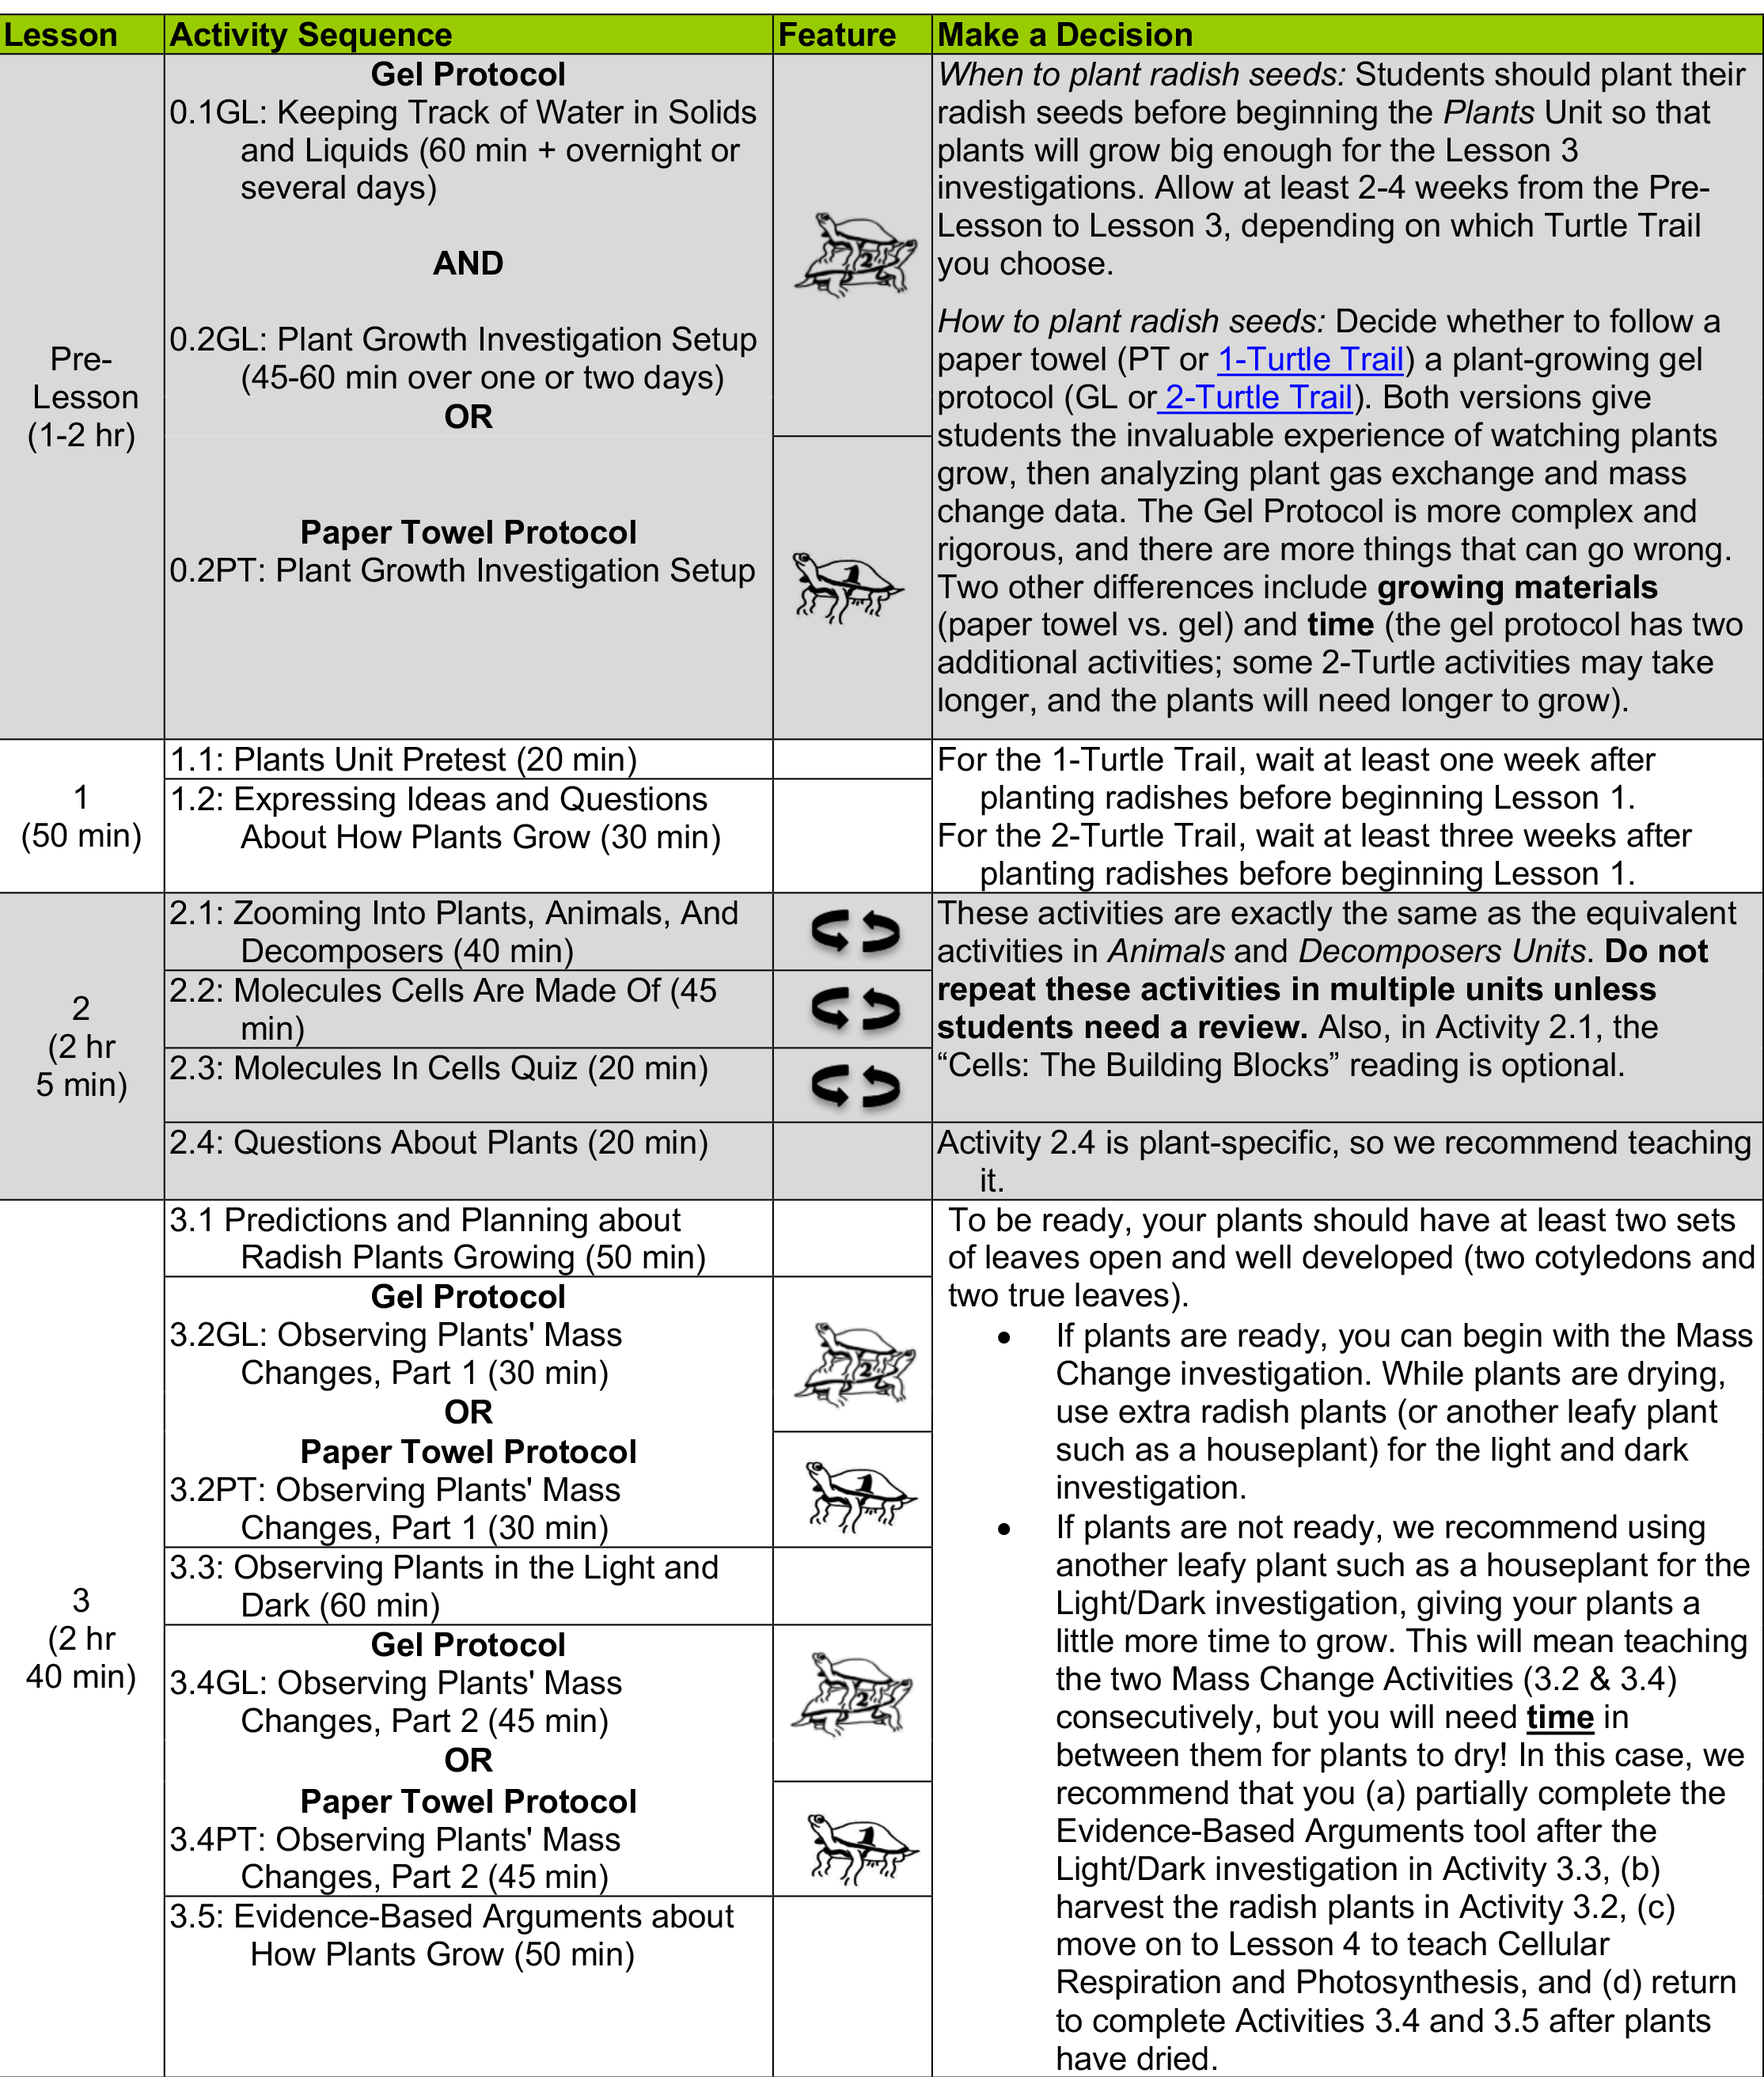
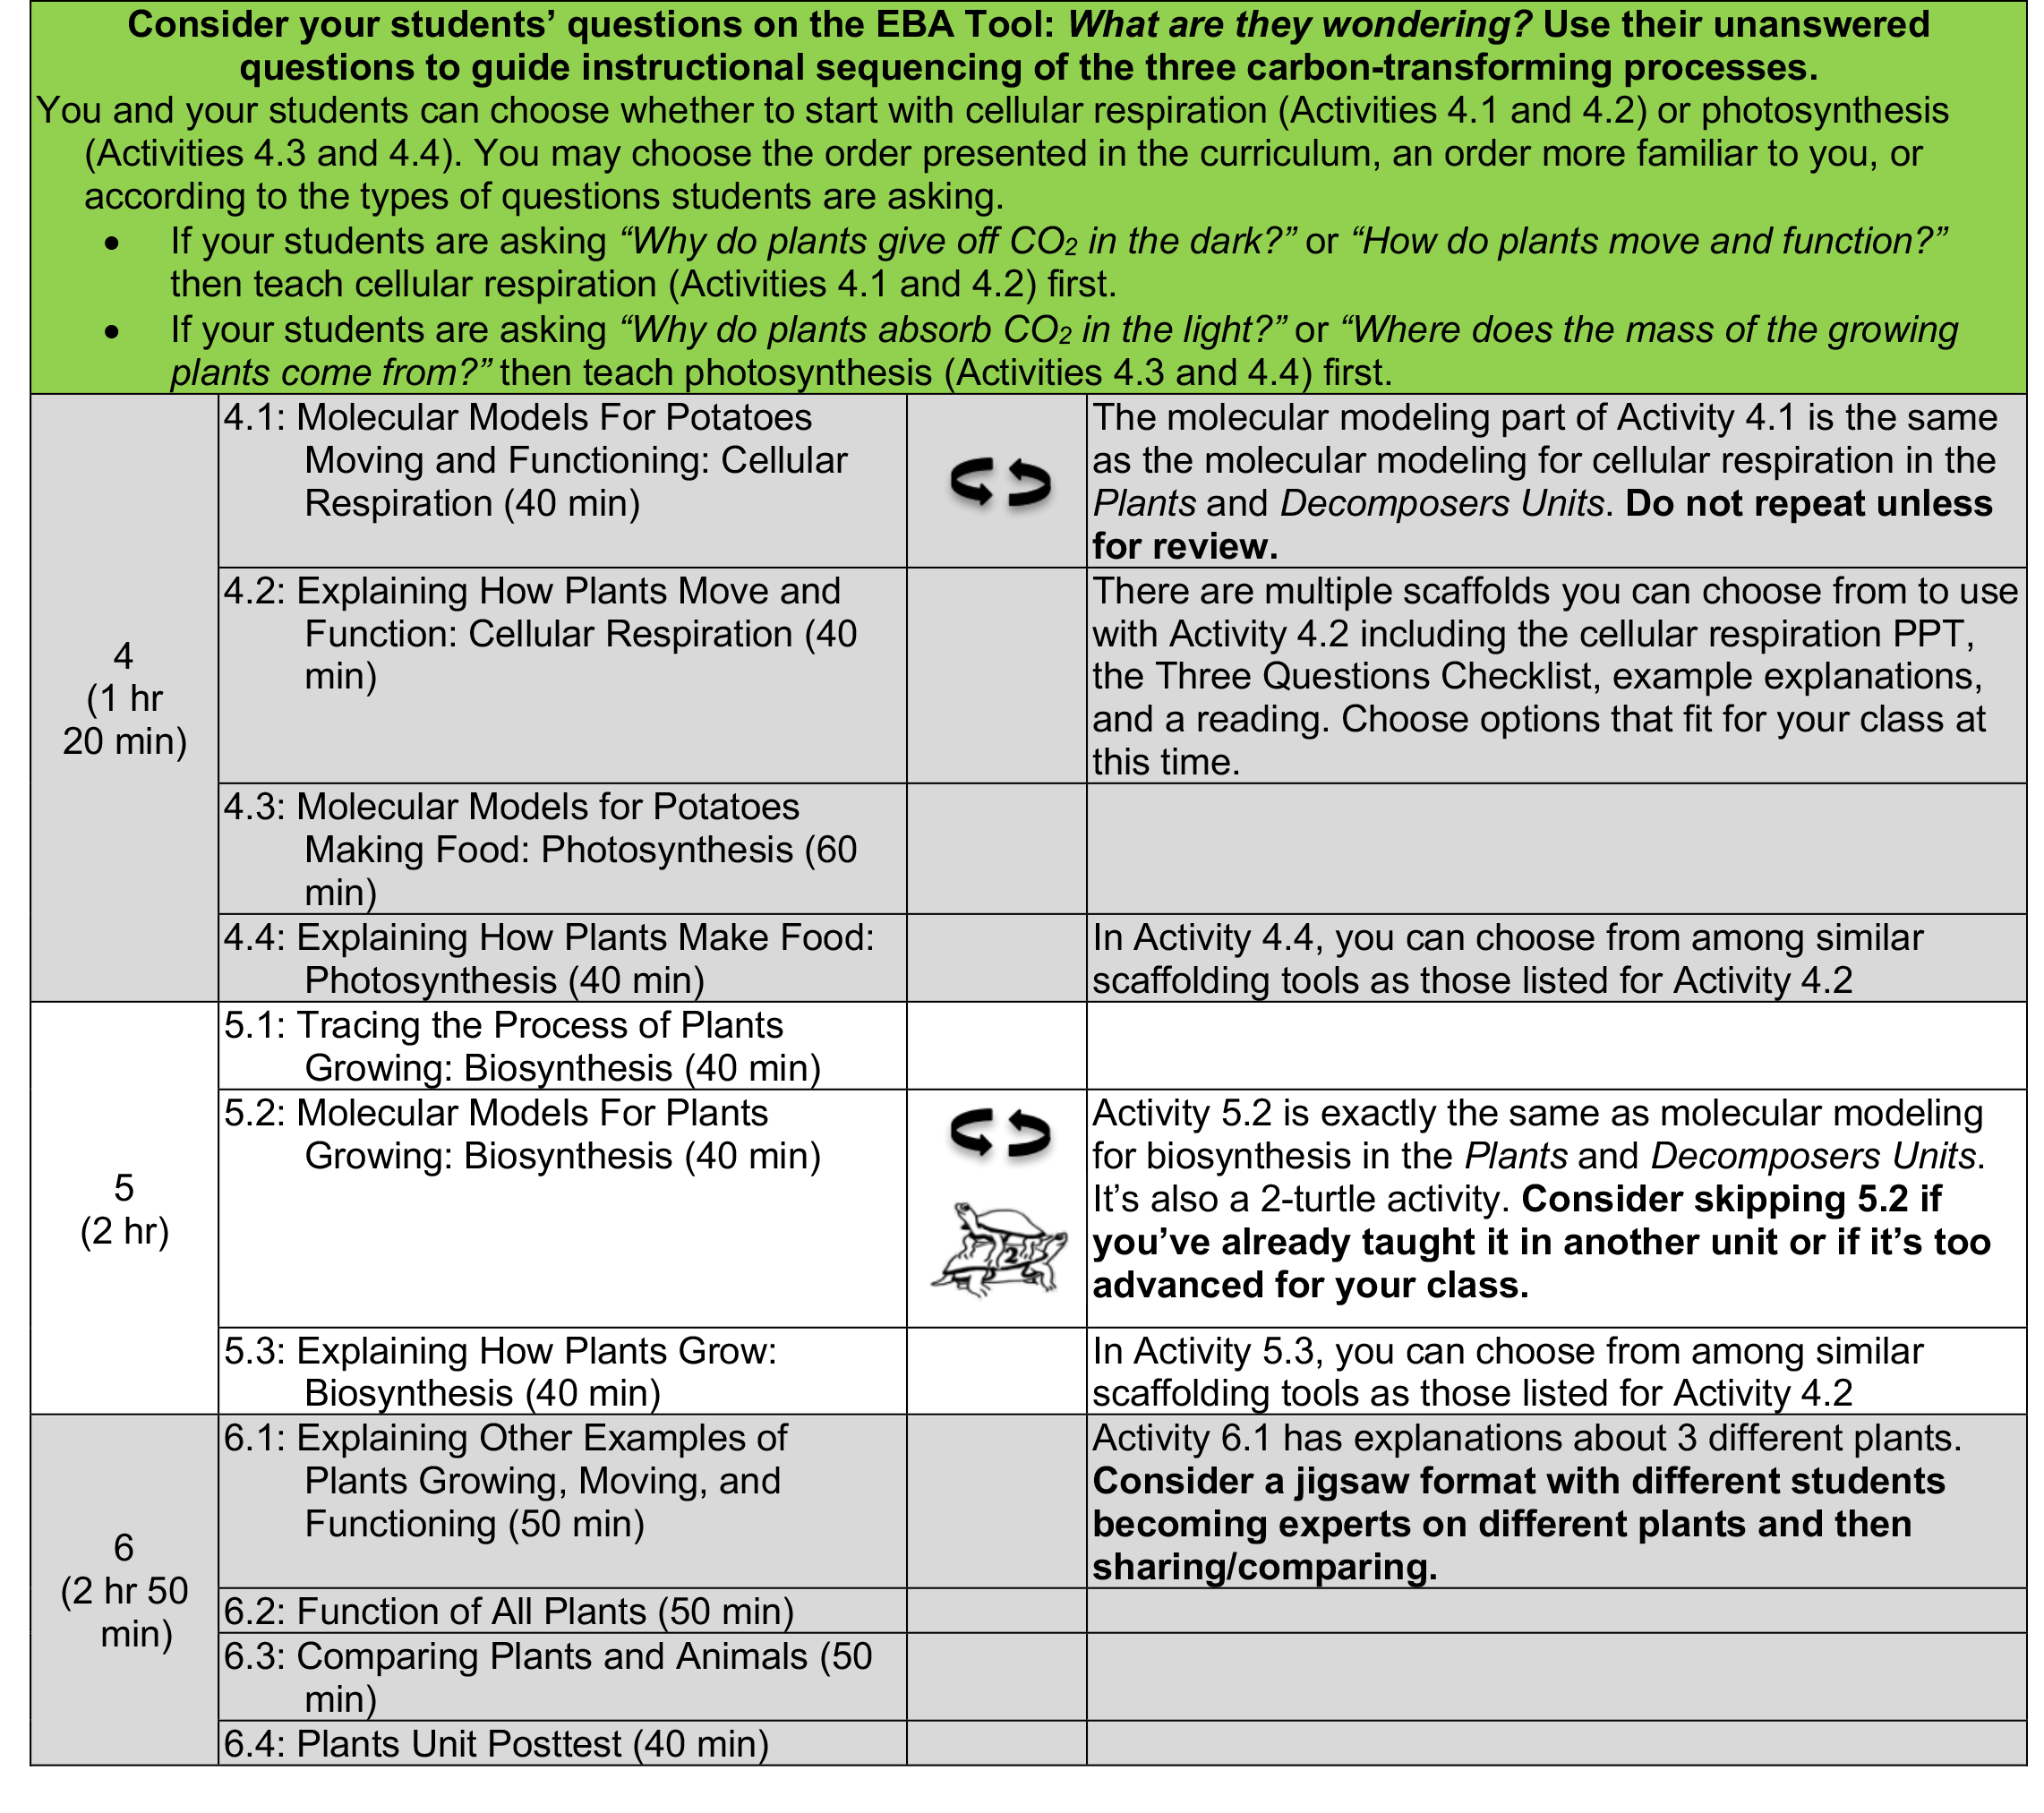
Before beginning the Plants Unit, you need to decide what to teach and importantly, what not to teach! Use this page to choose the unit sequence that’s most appropriate for your students.
- Some activities are REPEATING ACTIVITIES (
 ). Omit these activities if students have already completed them in another unit (unless you’d like students to repeat them as review).
 - Other activities are TWO-TURTLE ACTIVITIES (
 ), which place a higher demand on students. Decide whether the higher demand required by these activities will be useful or distracting for your students. The Carbon TIME Turtle Trails Document document provides further info about choices for making units more or less demanding, depending on your students’ needs.
Unless otherwise noted in the table below, all activities in the unit should be taught.


 Download PDF Unit Front Matter